Right now we have three trees that we can get to and easily pick the apples, then we have countless others on the rest of the property that have been neglected and are hard to get to. I am hoping that we will be able to have some help with our overgrown orchard from Purdue and their Horticulture Department. I was thinking that this would be a good teaching and learning experience that would also help us out. I thought that it would be nice for all of our trees to be producing fruit that we could easily pick and that we could then donate much of it to those in need. The more I think about this idea the more it appeals to me and I want to make it happen.
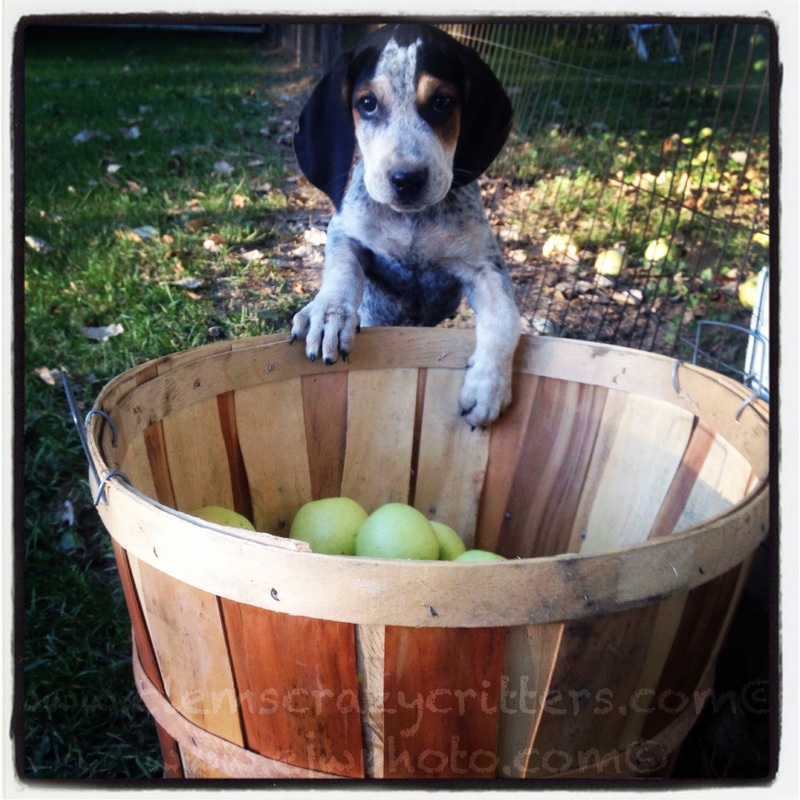
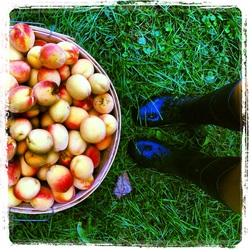
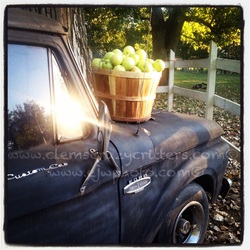
I think that it would be appropriate to say that we are overwhelmed with apples. We picked 2 bushels last night and barely put a dent in one tree. When Shannon and I went to pick some off of a different tree we realized that these were not even ready. There was not one apple on the ground and the fruit was hard to pull from the tree. Right now we have three trees that we can get to and easily pick the apples, then we have countless others on the rest of the property that have been neglected and are hard to get to. I am hoping that we will be able to have some help with our overgrown orchard from Purdue and their Horticulture Department. I was thinking that this would be a good teaching and learning experience that would also help us out. I thought that it would be nice for all of our trees to be producing fruit that we could easily pick and that we could then donate much of it to those in need. The more I think about this idea the more it appeals to me and I want to make it happen.
0 Comments
Over the summer our laying hen decided she was going to lay her eggs in an unknown location. So, for about 2 months we had no clue where to find her nest. Fortunately she has come back to us and is laying in her usual spot. RJ actually found the first egg in the middle of the yard and after that she has been consistent with 1 - 2 per day in her nesting box. Usually I just collect them daily, date them, and place them in the container in the fridge. However, I got to thinking that maybe I should be a little more careful when cleaning the eggs. So, I did a little research. I went to a few sites and was relieved to find that I am doing everything correctly, but if I want to be a little safer I can make sure to follow these guidelines. 1. Make sure that nesting boxes are clean and that there are enough of them to go around. Usually 1 box per 2 chickens is sufficient. 2. Collect eggs daily. If you have a bunch of chickens laying make sure that you collect in the morning and then again in the late afternoon or evening. 3. If you notice any broken eggs make sure that you clean them up ASAP and place clean bedding in the box. Chickens apparently will eat their own eggs and once they figure out they can will purposefully break them. 4. If any of the eggs are dirty you really only need to wipe them off with a clean dry cloth. The surface of an egg is porous and using harsh cleansers will only absorb into the egg. 5. If there is a lot of junk on the shell of the egg, you need to clean your nesting boxes, you need to collect the eggs more often, you may need more nesting boxes, and you will need to do more than just wipe down the shell. To clean a super dirty egg make sure that you use water that is warmer than the egg, it was recommended that it be 20 degrees warmer, and gently rub the area with a soft cloth or sponge. The warm water ensures that the egg shell does not contract (what happens if you use cold water) and draw bacteria into the egg. Warm water will allow the pores of the shell to expand keeping bacteria on the outside. 6. Make sure that your eggs are dry before placing in a bin for storage and I always write the date on each egg. 7. Eggs keep for a fairly long time. They are a perfect little package if you think about it. The food inside is never exposed to air or bacteria until the moment that you open it to prepare. If you keep eggs at a consistent temperature they will be good for about eight and a half weeks. Crazy, right? Think about it though, often farmers will have the eggs for while before they are sent to the market. If you want to test an egg before cracking it, place it in a cup of water. If the egg sinks it is good and if it floats at all then you should probably just get rid of it since it has begun to take in air. So, I have been doing everything right, my mind can rest easily. The only new fact that I learned was how long eggs will actually keep. I definitely have kept some for 6 weeks and they have been fine, but in the back of my head I always wondered. Although I like the Peach Preserves that I made I really wanted to make a jam and something with more than just a peach flavor. I found a few ideas for jams that use peach as the secondary flavor, but I wanted it to be the primary taste, so I improvised. Since jams should be made in small batches (making larger batches can destroy the gelling process) I actually adhered to that rule, I did not want to mess this up. Gather up your usual canning supplies, large pot for lids and jars, pressure canner, pot for your jam, jars and lids, etc. Ingredients & Process: 1. 8 cups of peaches. Boil water and allow the peaches to sit for a few minutes then transfer to cold water, the skins come right off. 2. 4 cups of strawberries. I used the frozen strawberries that I had, but you can always use fresh. Just make sure that they are properly cleaned and hulled. 3. Chop the peaches and strawberries and then transfer into a large pot. 4. Add the juice of 2 small lemons (make sure to strain the sends) to the peaches and strawberries and heat over medium/high until the fruit softens. 5. Using a hand blender, blend the peach/strawberry mixture until the fruit is well blended. 6. Add your spices, if you would like, as well as 3 cups of white sugar and 1 cup of brown sugar; stir well. 7. Turn the heat up to high and stir regularly so that your jam does not scald, you will want this to thicken and boil. You will want to have a thermometer on hand so that you know when the temperature of the jam reached 221 F, this will take between 45 minutes and an hour. 8. To test the consistency of the jam place a small spoonful on a glass plate that has been kept in the freezer, return to freezer and after a minute remove to see if the consistency is to your liking. 9. When the jam is gelled, remove from the heat and pour into your hot, sterilized jars and top with the lids. 10. You can process these in a hot water bath for 10 minutes or in a pressure canner for 10 minutes. Remember, the processing time starts once the water is boiling or once the canner is steaming and the gauge is at 5 pounds of pressure. 11. Remove the jars and place on a towel away from drafts so that the lids properly seal. If there are any jars that do not seal, place these in the refrigerator and use soon. Go get yourself some homegrown cucumbers and make some pickles this weekend. I had to make sure that my kids were not stealing them once they were sliced up. I think that Lily came into the kitchen a handful of times asking for more and then told RJ he could only have one. Sneaky. 1. Fresh cucumbers. 2. Fresh Garlic. 3. Dried Dill. 4. Kosher Salt. 5. Water. 6. White Vinegar. 7. Large pot for boiling jars and lids. 8. Medium/large pot for the brine mixture you will make. 9. Canner or extra large pot for the water bath. 10. Pint jars and lids. 1. Place the large pot on your stove after you have filled it about 3/4 of the way with water. You will want this water to boil. All of the lids and jars you will be placing your pickles in will need to boil for a couple of minutes in order to sterilize. 2. Combine 3 1/4 cups of water and 3 1/4 cups of white vinegar in your medium/large saucepan, then add 6 TBS of kosher salt. Place this over medium/high heat and allow to boil. 3. While you are waiting for your brine and water to boil wash all of your cucumbers and slice them to the size you would like your pickles. Make sure that you cut off the ends of the cucumbers. Leaving the ends on can cause the pickles to lose crispness because the blossom releases enzymes that cause softening. 4. Once your hot water has build place a couple of pint jars in at a time and allow to boil for a couple of minutes. Make sure that each jar is fully submersed so that it is sterilized. I put all of the lids in at once and leave them until I am ready for use. 5. Remove your pint jars and place them on their sides on a towel on the counter. Fill each jar with your sliced cucumbers and then turn upright. Continue this process until you have filled each jar and run out of cucumbers. 6. Set the jars upright and place 1 - 2 cloves of garlic, 1/8 tsp. dill, and 6 - 10 whole peppercorns on the top of the pickles. 7. Place the canning funnel in the top of each jar and fill with the brine mixture. The brine should fill the jar to about 1/4" from the top, make sure that the pickles are covered and there are no air bubbles. 8. Wipe down the rims of each jar with a clean towel so that your lids will properly seal. 9. Remove the flat part of the lid from the boiling water and place one on the top of each jar. Place a ring over each jar and tighten, you are now ready for the hot water bath. 10. Place the pint jars in your canner and fill the canner with hot water so that it covers the jars about an inch over their lids. Since the brine was boiling and the jars were just boiled, it is important to fill the pot with hot water, otherwise you run the risk of having broken jars. 11. Set the pot over high heat and cover. Once the pot comes to a boils you may start the timer for processing your pickles. 10 minutes. 12. After the 10 minutes is up, remove the pot from the heat and then remove the jars from the pot. I place my jars on a thick towel on my counter and allow them to cool over night. 13. If your pickles have sealed properly you will notice that the lid has been sucked down into the jar. If not, no big deal, just make sure to refrigerate them and remember that they will not keep as long. 14. Properly canned food should safely last for up to a year if not longer. 15. Even though I have sealed jars of pickles I try to keep them in the fridge so that I can maintain a more crispy pickle. We did not grow cucumbers this year, but a friend at school has been generous enough to bring some in for me. Apparently they over planted cucumbers so they have plenty to give. I made my first batch of pickles last weekend and while they look good I still have not tasted them. I only used a basic brine, some red pepper flakes, garlic cloves, and dried dill to make them. I was told that they might be a little spicy, so tomorrow I may make them without the red pepper flakes and instead use only whole black pepper. When canning pickles you cannot use a pressure canner, you only need to use a hot water bath to seal the jars. You may also just make refrigerator pickles, but those do not keep as long so you would not want to make large batches. I will take photos of each step this next batch I make and let you know exactly what I use in terms of spices. Peach Preserves, yum! I had to keep reminding myself throughout the process that this was not jam or jelly I was making, preserves are totally different.
All I used were peaches, some lemon juice, pectin, and a bit of cranberry juice. I probably should have done some measuring, but I did not and I am pleased with the results. I used my pressure canner once I got all of the preserves poured into clean, hot jars and processed them for 10 minutes. This morning I enjoyed some of these wonderful preserves on my pancakes…..so, so good. So the canning process began last night and only put a small dent in all of our peaches. However, I am comfortable with how I want the assembly line to go and know now that the process will be streamlined and faster...as long as the kids stay out of my way. Peaches are a fruit that you do not need to use a pressure canner for when straight canning, like I did last night, you can just use the boiling water bath. It is so important to make sure that the jars you are using are clean and sterilized and that there are no cracks along the rim. I washed all of our jars in the dishwasher and used them right away. Since I still have a few that have not been used the next time I can (today) I will make sure to let each one sit in boiling water for about 20 seconds. It is also necessary to boil both parts of the lids before placing them on top of your final product. I kind of did these peaches over a couple of days. I had time the other night to remove the pits and slice up the fruit. I stored the prepared peaches in the refrigerator in large Ziploc bags and they were ready to go last night. Here are the steps and they are rather simple. 1. Large pot filled with water, one that will hold a few glass quart jars at a time and allow about an inch of water to cover their tops. 2. Medium pot with boiling water and slotted spoon. (To remove skin from peaches) 3. Medium pot with boiling water. (To sterilize lids and jars) 4. Colander and large bowl. I had these in the sink and used this space to peel my peaches. 5. Canning jars and lids, canning tongs, paper towels, kitchen timer. 6. Medium pot. Prepare the sugar water (this will be used to fill the empty space in the jar), which is 3 cups of water to one cup of sugar. I made a lot and kept the extra in a large container in the fridge to use later. This will eliminate a step of prep and clean up, which is always great! Alrighty! We are ready to can some peaches! 1. Line up your canning jars along the side of your sink (after you have boiled them or run them through the dishwasher). Place your large bowl in the sink basin and the colander next to the bowl. On your stove you should have your large pot for boiling the jars (turn on the burner to this for a while to get the water warm so that the glass jars do not break when you put them in) as well as the 2 medium pots. 2. Place your pitted peaches in the medium pot of boiling water and give a quick stir. Let them sit for about 30 seconds and then remove them from the heat. At this point I brought the pot to the sink. 3. Using your slotted spoon scoop out the peaches into the bowl you placed in the sink. Fill the bowl with cold water and once the peaches are cool enough to touch reach in and grab a few. The skin should easily fall off, but if it does not you will only need to pull a bit and the peel will slide off. Place the peeled peaches directly into your canning jars. 4. Once you have finished with that batch of peaches pour the water in the bowl into the colander to strain the skins and empty the bowl. Place the medium pot back on the stove and add your next batch of peaches. Continue this process until all of your peaches have a new home in a canning jar. As you fill each jar make sure to tap it on the counter and help the peaches settle. The jar is full peaches are about 1" from the top. 5. Fill your jars with the sugar/water mixture so that there is only 1/2" of the jar empty. 5. If you have not already, place your lids in the pot of boiling water and sterilize them. While they are boiling carefully wipe the tops of each of your golden filled jars with a clean dish towel or paper towel. You want to make sure that the tops are both clean and dry so that they can seal. 6. Take out the flat part of the lid and place one on each of your jars (they make a really neat tool for this with a magnet so you do not burn your fingers)then secure this with the metal ring. Make sure to screw each lid on tightly and then you are ready to give them their baths! 7. Carefully place each jar into your large pot. Like I said earlier, make sure that the water is warm. Placing your warm jars of peaches into cold water could be disastrous. Make sure that the water covers the lids about an inch and then place the lid on the pot. 8. Allow your pot to come to a boil and then reduce the heat to medium. Set a kitchen timer for no less than 30 minutes and go do something productive. 9. Once the timer goes off carefully remove your jars with your canning tongs and place on the counter to cool. Your jars should be placed on a cooling rack or on a couple of dish towels and then be left alone to cool. DO NOT TOUCH THE LIDS before they are cool!!! 10. If you have done this properly you will notice that the lid has been sucked down and you have created a seal on your jar. You may even hear a lovely pop as each lid is sucked down and sealed, but do not worry if you miss the pop, as long as your lid is down you are good. Date each jar and store in a cool/dry place for up to a year. Next up, peach preserves. Canning preserves is a little bit different, but not much, since the recipe will be hot the jars need to be hot. We obviously have an abundance of peaches this year and need to find a way to preserve this wonderful blessing. I have canned peaches in the past and this SITE has a step by step guide on how to do that. I may do my own when I get a chance, but for now, this is perfect. Shannon has requested that we make some Peach Moonshine, so here is what we did... You will need: 2 - 64 oz bottles white grape peach juice 10-12 fresh peaches, peeled and quartered 2½ - 3 cups granulated sugar 6 - 7 cinnamon sticks or 1 tbs. ground cinnamon 1 750 ml bottle everclear 1 750 ml bottle peach schnapps
|
Blog by: Libby Clem.................... Archives
September 2020
Categories
All
|